Every October, the National Fire Protection Association sponsors Fire Prevention Week, the longest-running public health observance in the country. This year it runs October 4 through 10. The theme is “Charge into Fire Safety: Safe Charging Is a Superpower.” For the second year in a row, NFPA has built the campaign around lithium-ion battery fires.
Most of the messaging around this theme is aimed at homeowners: don’t overload an outlet, don’t charge a device under a pillow, unplug things when the battery is full. This is good advice, but it only tells part of the story. Commercial and industrial properties are dealing with a version of this problem that’s a lot bigger than a phone charger.
Where the risk actually shows up in a commercial setting
Lithium-ion batteries have become part of daily operations across a lot of industries. Warehouses now store fleets of e-bikes and electric scooters. Facilities run electric forklifts, power tools, and cleaning equipment off rechargeable battery packs. In addition, office buildings and multi-tenant properties are adding EV charging stations in parking garages. Data centers rely on battery backup systems to keep servers running during an outage. Each of these is a legitimate business need. Still, each one introduces a fire risk that most buildings weren’t originally designed to handle.
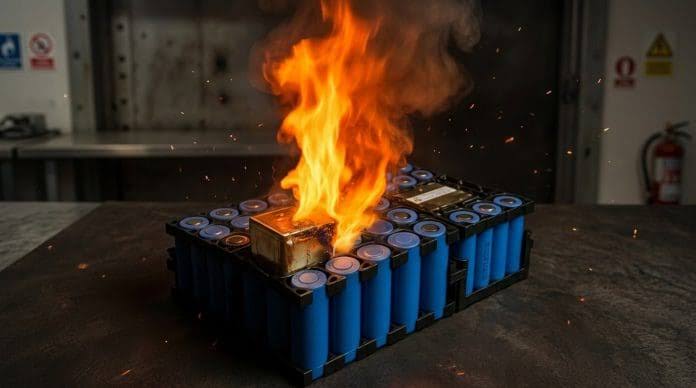
The problem isn’t just that lithium-ion batteries can catch fire. It’s how they burn. A damaged or overheated battery can go into thermal runaway, a chain reaction that produces intense heat, toxic gas, and a fire that’s difficult to extinguish with a standard water-based system. Furthermore, these fires can also reignite hours after they appear to be out, which is part of why they catch facility managers off guard.
What this means for property owners and facility managers
Fire Prevention Week is a good prompt to take a closer look at how battery-related risk is actually being managed on a property. Rather than assuming a general fire protection plan already covers it, consider reviewing your approach. A few questions are worth asking:
Are charging stations for e-bikes, scooters, or other battery-powered equipment located away from exits and combustible storage? Is there enough space around them for heat to dissipate safely?
Does the facility’s detection system account for the specific signs of a battery fire, which can develop and spread faster than a typical structure fire?
Is the suppression system appropriate for the materials being stored and charged in that space? Not every fire suppression setup is designed to handle a lithium-ion battery fire effectively.
Has staff been trained on what to do if a battery starts smoking, swelling, or overheating before it becomes an active fire?
These aren’t questions with a one-size-fits-all answer. The right setup depends on the building, what’s being stored, and how the space is used day to day.
Where Guardian fits in
This is exactly the kind of assessment Guardian’s partner companies handle regularly. They evaluate detection and suppression coverage for a new charging area. In addition, they update a fire safety plan to reflect equipment a building didn’t have five years ago. Or they simply walk a facility manager through what NFPA’s current guidance actually means for their property. Guardian combines a national network with technicians who know the local codes and the buildings in their own communities. This matters when the standards around battery storage and charging keep evolving as fast as the technology does.
If Fire Prevention Week has you rethinking how your property handles battery-powered equipment, now is a good time to have that conversation with your local Guardian partner.
If you manage commercial property, you’ve probably signed off on a sprinkler inspection invoice without giving it much more thought than any other line item. But here’s a number worth sitting with: according to NFPA research, closed control valves cause 61% of all sprinkler system activation failures, meaning the single most common reason a sprinkler system doesn’t work when it’s needed isn’t a design flaw or an old pipe. It’s a valve that got closed, likely due to unauthorized tampering or a lack of awareness regarding the purpose of the device. That’s the kind of failure a proper Fire Sprinkler Inspections program is built to catch before it ever becomes a problem. Here’s what property managers actually need to know. It’s Your Responsibility, Not the Fire Marshal’s
This surprises a lot of property managers: under NFPA 25 (the national standard covering inspection, testing, and maintenance of water-based fire protection systems), responsibility for keeping the system compliant sits with the building owner, not the installing contractor, and not the local fire marshal. The fire marshal enforces the standard; they don’t manage your compliance calendar for you. In practice, that means if your system falls out of compliance, it’s your name attached to it, whether that surfaces during an insurance audit, a certificate of occupancy renewal, or, worst case, after a fire where the system didn’t perform as expected. Furthermore, Fire Sprinkler Inspections are a crucial part of meeting those compliance obligations.
The Inspection Schedule, Simplified
NFPA 25 doesn’t run on a single “annual inspection.” It’s a layered schedule, with different components checked at different intervals. Routine Fire Sprinkler Inspections help ensure all components operate as they should throughout the year:
(Inspections vary due to state and county)
Quarterly
Control valves are in the open position, gauges are within compliance date and showing adequate pressure, riser is free of exterior damage, fire department connections have proper signage and caps present, hydraulic nameplates are attached and legible, spare sprinkler head box with wrench. Depending on your jurisdiction, you may also be subject to perform a waterflow and main drain test.
Annual
The big one: In addition to what is listed above – full inspection from the ground checking the condition of sprinkler heads, piping, bracing, hangers, and fittings. Exercise all valves to verify operability, perform main drain & waterflow test.
Every 5 Years
Along with everything performed during the quarterly and annual – internal pipe inspection, hydrostatic test on FDC to check valve, replace or calibrate pressure gauges. Depending on your jurisdiction, an above ceiling visual inspection may be needed as well.
Beyond this schedule, NFPA 25 also calls for more frequent visual checks (weekly or monthly, depending on system type) on control valves and gauges. The three tiers above, though, are where the more substantial inspection and testing work happens, and where most compliance gaps tend to show up. As a result, consistent Fire Sprinkler Inspections are essential to keeping your building safe and complaint.
Three Things That Commonly Get Missed
1. The spare sprinkler cabinet. NFPA 25 requires a stocked cabinet of spare sprinkler heads on site at all times (the exact quantity scales with your system size), along with the correct wrench for each head type. It’s a small, easy to overlook requirement, but without it, a damaged or activated sprinkler can’t be promptly replaced, which means your system sits impaired for longer than it should.
2. Combining or deferring quarterly visits. It’s tempting to bundle inspections to save time, but quarterly inspections can’t be pushed into a single annual visit; they need to happen on their own cadence. Many property managers do successfully align them with other routine building maintenance to cut down on separate site visits, which is a smart move, just not a substitute for the actual frequency.
3. A quiet drop in water pressure. During a main drain test, a residual pressure drop of more than 10% compared to the original acceptance test (or the previous year’s test) is a signal of a developing water supply problem, something that’s easy to miss if nobody’s tracking test results year over year, but critical to catch early.
What Happens If You Skip It
Beyond the obvious life safety risk, non-compliance tends to surface at the worst possible times: a failed insurance audit, a denied claim after a loss, a delayed certificate of occupancy, or a citation during a routine fire marshal visit. Records also matter here: NFPA 25 requires inspection, testing, and maintenance documentation to be retained (a minimum of one year for routine inspections, and for the life of the system for others), so even a well maintained system can create headaches if the paperwork isn’t there to prove it.
Making It Easy to Stay on Top Of
Work with a qualified, licensed fire protection contractor who tracks your specific schedule for you (quarterly, semi-annual, annual, and 5 year) rather than trying to manage the cadence internally
Confirm which edition of NFPA 25 your local AHJ has adopted, since requirements can shift slightly between editions
Ask about electronic valve supervision, which can meaningfully reduce your team’s day to day inspection burden between these scheduled visits
Keep a running compliance record, not just individual invoices. A clear year over year history makes audits, insurance renewals, and ownership transitions far less stressful
A well run sprinkler inspection program isn’t just a compliance checkbox. It’s what makes sure the system actually works the one time it truly matters. If it’s been a while since you’ve had a clear picture of where your building stands across these inspection tiers, that’s usually the best place to start. Regular Fire Sprinkler Inspections will help you stay ready and protect your investment.
If you own or manage a commercial building, it’s important to understand the basics of fire safety, which is why this article provides a Fire Alarm Installations Overview. Your fire alarm control panel — often called the FACP — is the single most important piece of safety equipment on the property. It’s the central system that detects danger, triggers evacuation, and alerts the fire department, often before anyone in the building even smells smoke.
You don’t need to know how to wire one. But understanding the basics of how installation works — what drives cost and timeline, what your provider should be doing, and what to expect once the system is live — helps you make better decisions, avoid surprises, and stay confident that your building is actually protected and compliant.
Choosing the Right System for Your Building
Every fire alarm installation starts with one decision: conventional or addressable.
Conventional systems group detectors and pull stations into zones. When an alarm triggers, the panel tells first responders the general area — “second floor,” for example — but not the exact device. These systems should really only be used for sprinkler monitoring systems where all of the devices are in the same general space.
Addressable systems give every single device its own unique ID. When something triggers, the panel identifies the exact device and location — “Room 302 smoke detector” — instead of just a zone. For larger buildings, multi-tenant properties, or anywhere faster, more precise emergency response matters, this is the standard. Addressable systems come in many different sizes and capabilities. The smallest panels max out at 50 points, and the larger systems are capable of tens of thousands of points.
The right choice comes down to your building’s size and complexity. A good provider will walk you through this trade-off rather than defaulting to whichever is easier to sell.
What to Expect: Permits and Code Compliance
All fire alarm installations in the U.S. must comply with NFPA 72, the National Fire Alarm and Signaling Code. Before any work begins, your fire protection company needs to submit detailed shop drawings, battery calculations, and equipment specifications to your local Authority Having Jurisdiction (AHJ) for approval.
This step is where a lot of project timelines get misunderstood. It’s not unusual for permitting to take weeks, and it can take longer depending on where your building is located. A historic building in a city with preservation ordinances may face additional design constraints. A property in a coastal or seismically active area may require specialized bracing or corrosion-resistant equipment. None of this means something has gone wrong — it means your provider is doing the process correctly for your specific location.
Panel Placement and Accessibility
Your panel should be installed somewhere clean, dry, and easy for emergency responders to reach quickly — usually near the main entrance or in a dedicated mechanical room. Strobes and horns need to be mounted where they won’t be blocked by furniture or partitions, and manual pull stations must sit between 42 and 48 inches off the floor to meet both fire code and ADA accessibility requirements. (Manual pull stations are usually only required near the FACP in a fully sprinklered building.)
The panel should also be properly grounded, which protects its internal electronics from power surges and lightning — a detail worth confirming with your provider, since a damaged panel is a compliance and safety problem you don’t want to discover during an actual emergency
How Your System Catches Problems Before They Become Emergencies
One of the most valuable things about a modern fire alarm system is that it doesn’t just wait for a fire — it constantly monitors its own health. Behind the scenes, the panel continuously checks that every circuit is intact. If a wire is damaged or a device gets disconnected, the system flags it immediately as a “trouble” signal, long before it would ever affect your building’s protection.
This is why an occasional trouble signal isn’t necessarily bad news — it usually means the system is doing exactly what it’s designed to do: catching small issues before they become real ones.
Beyond the Alarm: HVAC Shutdown and Backup Power
A well-integrated fire alarm system does more than sound an alarm. In many commercial buildings, it’s connected directly to the HVAC system, so that in the event of a fire, rooftop units and air handlers automatically shut down. This keeps smoke from circulating through ductwork and spreading to parts of the building that would otherwise stay safe longer.
Power reliability matters too. Per NFPA standards, every system needs battery backup capable of running in standby mode for 24 hours, followed by a full 5 minutes of alarm signaling — even if the building’s power is completely out. That means your protection doesn’t disappear during a storm or outage, which is often exactly when fire risk is highest.
What Happens During Final Testing and Sign-Off
Before your building can legally open its doors, every device in the system gets tested — every detector, every pull station, every horn and strobe — along with HVAC shutdowns and elevator recalls, during a formal walkthrough with the AHJ or fire marshal. Only once that inspection is passed is the building cleared for occupancy.
That’s not the end of the story, though. Fire alarm systems require ongoing inspection and testing on a regular schedule to remain code-compliant — this isn’t a one-time install-and-forget system. If your current provider hasn’t talked to you about a testing and maintenance schedule, that’s a conversation worth having.
Smart Questions to Ask Your Fire Protection Provider
Whether you’re installing a new system or upgrading an old one, a few good questions can tell you a lot about the quality of the work being done:
Are they licensed and experienced with your specific system type and local code requirements?
Will every device be UL-listed and verified compatible with your panel? (This has to be done or will not be approved for permit.)
Will the system and wiring be clearly labeled and documented, so future service calls are fast and accurate?
If you’re renovating at the same time, how will active detectors be protected from construction dust to prevent false alarms or sensor damage?
What’s the required inspection and testing schedule going forward, and will they handle it?
If the panel shows a trouble signal at 2 a.m., who do you call, and how fast will they respond?
A provider who can answer these clearly and confidently is one you can trust with the rest of the project.
The Bottom Line
Your fire alarm system is protecting your tenants, your building, and your liability every single day it’s in operation. Getting the installation right — and keeping it maintained afterward — isn’t optional, and it isn’t something to leave to the lowest bidder. Working with a licensed, experienced fire protection provider, like Guardian Fire Services and its network of local partner companies, means every phase — permitting, installation, testing, and the inspections that follow — is handled the right way, the first time.
Frequently Asked Questions
What’s the difference between conventional and addressable fire alarm systems, and which one do I need? Conventional systems identify the general zone of an alarm and tend to cost less, making them a reasonable fit for smaller, simpler buildings. Addressable systems pinpoint the exact device and location, offering faster, more precise emergency response — the standard for (all new fire alarm systems) larger or multi-tenant commercial properties. (If a company is recommending a conventional fire alarm system, you should question the company)
What permits are required, and how might my location affect the process? All U.S. installations must comply with NFPA 72. Your provider submits shop drawings, battery calculations, and equipment specs to your local Authority Having Jurisdiction for approval before work begins. Local conditions — historic preservation rules, seismic codes, coastal corrosion requirements — can extend timelines or add requirements, which is normal and expected in the right locations.
Where does the panel get installed, and what accessibility rules apply? Panels go in a clean, accessible location like a main entrance or mechanical room. Pull stations must sit 42–48 inches above the floor to meet NFPA and ADA requirements, and the panel itself needs proper grounding to protect it from electrical surges.
Guardian Is Growing: Join Our Team of Fire Protection Professionals
At Guardian, growth creates opportunity. As our company continues to expand across the country, we are actively hiring experienced fire protection professionals who want to build a career with a company that values safety, craftsmanship, teamwork, and long-term success. In fact, if you’re searching for job postings, you’ll notice Guardian is now hiring in several regions.
We are looking for talented professionals across multiple disciplines, including fire sprinkler technicians, fire sprinkler inspectors, fire alarm technicians, fire alarm inspectors, AutoCAD designers, fire suppression technicians, business development representatives, fire sprinkler fitters, and estimators. These roles are essential to helping us continue delivering the dependable service our customers expect. To be clear, our team is “Now Hiring” great candidates to fill these important positions.
Fire protection is essential work. Every system installed, every inspection completed, and every alarm or suppression system tested helps protect people, property, and critical assets. That is why we are committed to hiring skilled professionals who take pride in doing things the right way and understand the importance of code compliance, customer service, and technical accuracy. At this time, Guardian remains focused on keeping its Now Hiring message clear—skilled applicants are encouraged to apply.
Why We’re Hiring
Guardian is growing, and with that growth comes the need for more experienced talent in the field, in the office, and on the design side. As we expand, we are focused on building strong teams that can support our partners and customers with the same high level of quality and responsiveness they expect from us. Notably, Now Hiring remains at the forefront of our recruitment approach as we search for dedicated professionals.
This is a great time to join Guardian because we are not just filling roles — we are building careers. Our hiring efforts are part of a bigger effort to strengthen our platform, support our branches, and create opportunities for professionals who want to grow with a company that is on the move. With jobs available, Guardian is now hiring to support our ongoing growth.
Open Roles:
Fire Sprinkler Technician
Fire sprinkler technicians are responsible for installing, servicing, troubleshooting, testing, and repairing sprinkler systems. We are looking for candidates with hands-on experience, strong technical knowledge, and a commitment to quality work and safety. Guardian is currently hiring, so if you’re searching for a role, know that Now Hiring applies to this position as well.
Fire Sprinkler Inspector
Fire sprinkler inspectors help ensure sprinkler systems are functional, documented properly, and ready to perform in an emergency. This role involves system testing, documentation, identifying deficiencies, and communicating clearly with customers and team members. Are you looking for a new opportunity? Guardian is now hiring for inspector roles.
AutoCAD Designer
Our design team plays an important role in supporting projects from start to finish. AutoCAD designers help create accurate fire protection drawings and technical documentation that support sprinkler and fire alarm systems, project execution, and code compliance. Job seekers can be assured—Guardian is now hiring qualified AutoCAD designers to strengthen our growing team.
Fire Alarm Technician
Fire alarm technicians install, test, service, and troubleshoot fire alarm systems that are critical to building safety. We are looking for people who can work with precision, communicate clearly, and help ensure systems are reliable and compliant. Apply now—Guardian’s careers page clearly states we are hiring and looking for skilled fire alarm techs.
Fire Alarm Inspector
Fire alarm inspectors help verify that alarm systems are functioning properly and meet required standards. This role includes inspections, documentation, deficiency identification, and supporting customers with professional service and follow-through. For anyone considering joining our team, Guardian is now hiring for inspector positions.
Fire Suppression Technician
Fire suppression technicians help protect commercial kitchens and other high-risk spaces by inspecting, servicing, and maintaining suppression systems such as kitchen hood systems. This is highly specialized work that requires technical skill, attention to detail, and a strong understanding of safety standards. To highlight, Guardian is actively searching for new hires—fire suppression technician is among our Now Hiring roles.
Business Development Representative
Our business development team helps open doors, build relationships, and support growth across Guardian. This role is ideal for someone who is relationship-driven, motivated by opportunity, and excited to help connect customers with the fire protection solutions they need. Those interested in business development opportunities should take note: We are now hiring capable professionals in this area.
Fire Sprinkler Fitter
Fire sprinkler fitters play a critical role in installing systems that protect lives and property. We are looking for skilled fitters who can bring craftsmanship, reliability, and a strong work ethic to the job site every day. Additionally, fire sprinkler fitter is one of the main roles for which Guardian is now hiring.
Estimator
Estimators help shape projects by providing accurate pricing, technical review, and scope development. We are hiring experienced estimators, including those with fire sprinkler industry expertise, who can help us build strong projects and support growth across the organization. Don’t miss your chance—Now Hiring includes estimator professionals here at Guardian.
What We Value
At Guardian, we value more than technical experience. We look for people who are dependable, professional, safety-minded, and committed to doing high-quality work. We want team members who can work independently, collaborate well, and take pride in protecting lives and property every day. We make it clear to all: Now Hiring is not just a phrase, it’s our commitment to finding quality team members.
We also value growth. Whether someone is coming from the field, the office, or the design side, we want people who see Guardian as a place where they can contribute, learn, and build a long-term career. At any level, Now Hiring is part of our promise to always welcome new talent.
Build Your Career With Guardian
If you are an experienced fire protection professional looking for your next opportunity, Guardian is hiring. Our growth is creating real demand for talented people who want to be part of a company that is expanding, investing in its teams, and committed to making a lasting impact. No matter your background, Guardian is unequivocally Now Hiring across many career paths.
We’re proud of the work we do, and we’re looking for professionals who want to be proud of it too. If you’re interested in joining a company that values service, safety, and long-term growth, we’d love to hear from you. So, don’t wait—apply today while Guardian is still Now Hiring exceptional professionals like you.
As the property manager, you’ll want to know what to expect during a fire sprinkler inspection.During a fire sprinkler inspection, a licensed contractor will check sprinkler heads, piping, valves, and alarm components—typically completing a mid-sized commercial building in 2–4 hours.
During a commercial fire sprinkler inspection, a licensed contractor will physically examine every sprinkler head, pipe, valve, alarm device, and gauge in your system—and run functional tests required by NFPA 25—typically completing the process within a few hours depending on building size.
NFPA 25 governs all commercial fire sprinkler inspections in the U.S.
Inspections cover physical components, functional flow tests, and alarm verification.
Property managers must provide access, coordinate staff, and plan for potential water discharge.
You will receive a formal report listing any deficiencies and required repairs after every inspection.
Unresolved deficiencies carry compliance and liability risk — track them until closed.
Your annual fire sprinkler inspection is governed by NFPA 25 ( National Fire Protection Association standard that governs inspection, testing, and maintenance of water-based fire protection systems), which outlines the minimum requirements for inspecting, testing, and maintaining water-based fire protection systems. A qualified fire protection contractor will typically walk through the entire sprinkler system, checking components such as:
Sprinkler heads for paint overspray, corrosion, physical damage, excessive debris, or incorrect orientation
System piping for leaks, corrosion, physical damage, or improper supports
System valves for correct open/closed position, freedom of operation, and proper supervision
Alarm devices for functionality and activation timing within code requirements
Sprinkler gauges for adequate system pressure and whether they are past their replacement date.
These checks are less about “failure” and more about catching small issues before they become big problems. Your role is to ensure access is clear and that operations staff are available to open locked areas or provide system information if needed.
What you’ll see during the on‑site visit:
On the day of the inspection, expect the contractor to:
Check in with property staff to confirm building occupants are aware of the inspection and any planned tests.
Walk every floor or zone, documenting component conditions with field notes and photos.
Verify that all control valves are in the correct position, properly locked or supervised, and clearly labeled.
Inspect gauges, alarm components, and tamper switches for correct function.
The visit is methodical. The more accessible your mechanical rooms and riser spaces are, the faster and cleaner the process will be. Depending on your system type and jurisdiction, NFPA 25 may require functional tests during or shortly after the annual inspection.
Your Pre-Inspection Checklist as a Property Manager Your role during a fire sprinkler inspection is access and coordination, not technical expertise. Before the contractor arrives:
Confirm all mechanical rooms, utility spaces, and concealed access panels are unlocked and accessible
Have as-built or record drawings available if your contractor requests them
Schedule the inspection during low-occupancy hours to reduce operational disruption and the impact of any planned flow tests
Coordinate with both your sprinkler contractor and your fire alarm contractor so tests are run simultaneously rather than in separate visits
Plan for the possibility of minor water discharge near test connections — have towels or absorbent materials available, and protect sensitive equipment in adjacent areas
The more prepared you are before the visit, the fewer surprises you will have after.
What you’ll receive after the inspection:
Once the inspection is complete, you should expect a formal NFPA 25 inspection report that includes:
Documentation that the inspection occurred, which you can forward to the AHJ, insurance carrier, or owner for compliance records.
A system‑by‑system breakdown of findings (e.g., “heads damaged,” “valve tamper alarm not functioning”).
A list of deficiencies or “non‑compliances” that must be corrected, often with priority levelPost-Inspection Reports and Deficiency Tracking
After every NFPA 25 inspection, you are entitled to — and required to retain — a formal written inspection report. That report will include:
Documentation of the inspection date, scope, and contractor credentials for your compliance records
A system-by-system breakdown of findings covering every component examined
A deficiency list identifying any non-compliant conditions, typically categorized by priority level (e.g., items requiring immediate repair vs. items requiring correction before the next inspection)
A repair proposal with recommended corrective actions and estimated costss.
Proposal from the inspection contractor outlining the repairs needed to gain compliance
Your job is to:
Review the report with the owner or facilities team to understand timing and cost of any required repairs.
Track deficiencies in your project or asset‑management system until they’re resolved.
Update operations and maintenance logs with the inspection date and any changes made to the system.
How to Respond to Inspection Findings
Once you have the report in hand, your responsibilities shift to documentation and follow-through:
Review the deficiency list carefully—understand what each finding means, the associated risk level, and the timeline for required repairs
Do not close the loop in your head; track every deficiency in writing until it is formally resolved and re-inspected if required
Update your operations and maintenance logs to reflect the inspection date, findings, and any repairs completed
Notify your insurance carrier if any significant deficiencies are identified—some carriers require notification of open fire protection deficiencies within a defined window
Unresolved deficiencies are not just a compliance problem. They are a liability exposure. Treat the repair list as a mandatory work order, not a suggestion.
How to plan for the next annual inspection:
To make each year smoother, treat the annual sprinkler inspection as a recurring project milestone rather than an isolated event. You can:
Add the inspection date and scope to your annual preventive‑maintenance calendar.
Share a checklist with facilities staff so they can pre‑inspect obvious issues (dusty heads, missing signage, etc.) before the contractor arrives.
Build inspection and corrective‑work costs into your facilities or capital‑planning budget so they don’t appear as “surprises.”
By knowing what to expect everytime your inspection comes around, you can help make the inspection efficient, protect your team, your building, and your reputation while keeping NFPA 25 compliance running like clockwork.
Fire sprinkler installations are too often scheduled last and blamed first when tenant improvement projects run behind. A familiar story repeats: the sprinkler contractor does not see the ceiling plan until permits are submitted, the HVAC layout consumes the available plenum, and everyone waits on revised sprinkler drawings before the ceiling can close. Meanwhile, occupancy dates slip, the tenant is frustrated, and scheduling blame circulates.
This pattern exists because sprinkler work is treated as a downstream trade, planned after major design decisions are already locked in. In reality, sprinkler installation planning needs to move upstream if you want predictable schedules and smooth turnovers on tenant build-outs in Nashville and the surrounding markets.
Why sprinkler planning needs to start before design is locked in
Most trades can adapt to design decisions that were made without their input. The fire sprinkler system cannot. By the time the ceiling grid, HVAC layout, and partition walls are finalized, the space left for sprinkler piping and heads is already dictated.
If your sprinkler contractor was not part of those conversations, they inherit constraints they did not create and cannot easily fix in the field—often at premium cost and with schedule impact.
How ceiling and partition layouts shape head placement
Suspended ceiling grids do more than define aesthetics; they define where sprinkler heads can and cannot go. NFPA 13 has specific rules for head spacing, deflector position, and coverage geometry around high/low ceiling transitions, soffits, and open plenum conditions.
When ceiling design is completed before a sprinkler contractor reviews it, you frequently end up reworking either the ceiling or the sprinkler layout, adding cost and delay. Once the ceiling contractor has mobilized, their sequence is fixed; if overhead piping is not complete before the grid goes in, something will slip in your schedule.
Early coordination between ceiling design and sprinkler layout is the simplest way to avoid these conflicts.
What your sprinkler contractor needs from day one
Early engagement with your fire sprinkler contractor is straightforward, but it has to happen before schematic design is finalized. From the outset, your contractor should have:
Occupancy classification for the tenant space
Ceiling heights across all areas
Hazard classification and anticipated occupant load
Data on whether the existing system main can support additional zones
A clear understanding of how the tenant will actually use the space (office, light manufacturing, restaurant, etc.)
A change in use—for example, converting office space to light manufacturing or a commercial kitchen—can completely change the fire sprinkler system design requirements. Schedule a sprinkler planning conversation before schematic design is complete, not after permits have already gone in for review.
Understanding the Scope of a TI Fire Sprinkler Installation
No two tenant build-outs have the same sprinkler scope, and confusing one scenario for another is how budgets and timelines get derailed. Typical conditions include:
Minor layout updates: A handful of head relocations to accommodate new partitions
Zone extensions: Added branch lines from an existing main, with hydraulic checks to confirm capacity
Full redesigns: New system layouts required due to occupancy classification changes or non-compliant existing coverage
Each scenario carries different lead times, permitting expectations, and cost drivers. Knowing which situation applies—before you publish the project schedule—is essential.
Modifying an Existing System vs. Installing New
Moving existing sprinkler heads to new locations is typically the least disruptive option. The main piping network remains largely intact while head locations are adjusted to match the new layout; this still requires permits and inspections, but with relatively predictable cost and time.
Zone extensions are more involved. New branch lines are added from the existing main, and your contractor must confirm that available water supply and system capacity can handle the additional demand.
Where tenant areas lack coverage entirely, or where new occupancy classifications make the current system non-compliant, a full new system installation becomes necessary. Each path has a different impact on budget, schedule, and approvals.
Sprinkler Zone Design and Layout Planning
During design, your fire protection contractor will:
Define sprinkler zones within the tenant space
Complete hydraulic calculations
Produce full drawing sets and submit them to the Authority Having Jurisdiction (AHJ) for review
Zone design determines how the system is divided, which areas are fed from which supply branches, where control valves and flow switches are located, and how the layout integrates with the ceiling plan without leaving gaps in coverage. Getting zone layout right on paper is significantly more cost-effective than correcting it in the field.
Plan Review Timelines and AHJ Requirements
Jurisdictions vary widely in how long they take to review and approve sprinkler plans. Some cities can turn around permits in about five business days; others take four to six weeks for a first review cycle and may require additional revision rounds.
If your construction calendar does not account for the AHJ’s review and revision timelines, you will encounter schedule gaps exactly when you can least afford them. Many jurisdictions publish specific tenant improvement guidance that outlines TI sprinkler expectations under NFPA 13, consolidating requirements into a single resource.
Submit early. Late permit submittals rarely work in your favor.
Rough-In vs. Final Installation Milestones
Field work occurs in two main phases for TI sprinkler projects:
Rough-in: Installing piping above the ceiling prior to closure
Final trim: Installing sprinkler heads, cover plates, and performing system testing after ceilings are complete
Both phases must align with the overall construction schedule. Rough-in must be completed and inspected before the ceiling contractor starts, and final trim cannot occur until ceilings are finished. Missing either handoff compresses the schedule in ways that are difficult and expensive to correct.
Coordinating Sprinkler Work With Other Trades
The ceiling plenum is the most constrained real estate on a tenant improvement job. HVAC ductwork, sprinkler piping, electrical conduit, cable trays, structural framing, and fire alarm devices all compete for the same space.
If conflicts between trades are not resolved before installation, they will be solved in the field—with added cost and time. Early coordination is essential for predictable, on-time TI projects.
Why the Ceiling Sequence Drives the Schedule
The ceiling grid installation is the last overhead activity and effectively locks in your sequence. Before grid installation, HVAC rough, electrical rough, and sprinkler rough all must be complete and inspected.
Your sprinkler contractor should attend any preconstruction meeting that involves the ceiling sequence. If they are not in that room, you will hear about conflicts in the field instead of addressing them on paper where they are cheaper to fix.
Resolving Conflicts With HVAC and Mechanical Trades
Effective coordination with mechanical trades does more than prevent clashes; it can simplify mechanical scope. In certain configurations, a properly designed and coordinated sprinkler system can eliminate the need for fire dampers in HVAC ducts that penetrate one-hour fire barriers, reducing complexity and cost for the mechanical contractor.
Electrical and Low-Voltage Interference Points
The ceiling plenum also carries electrical conduit, low-voltage cable trays, fire alarm devices, and sprinkler piping. A clear protocol keeps everyone productive:
All overhead trades review the layout together before installation begins
Routing zones are agreed upon so trades are not fighting for the same pathways
A predefined process exists for resolving conflicts when they arise
Identify who owns that arbitration conversation before mobilization—not after crews are onsite.
Phasing Sprinkler Installation to Match Build-Out Milestones
If fire sprinkler installation is not phased to match the overall build-out, pressure will mount on every subsequent step. Inspections can stall, other trades can be left waiting on approvals, and occupancy dates can shift.
Phasing itself is not complicated, but it must be agreed upon before demolition and construction begin so that each milestone aligns with real-world trade availability and AHJ requirements.
Pre-Construction Planning Checklist
Before anyone starts demolition or overhead work, confirm these items:
Existing fire sprinkler system capacity can support the planned scope
Ceiling designs are finalized enough to allow coordinated layouts
Permit applications are prepared and submitted as early as the design allows
A preconstruction coordination meeting is scheduled with all overhead trades to define sequence and sign-off criteria for each phase
This one-time planning step prevents repetitive rework and reduces surprises during construction.
Rough-In Timing vs. Other Overhead Trades
On typical TI jobs, the sequence follows this pattern: demolition, then HVAC, electrical, and sprinkler rough-in working in the overhead space at roughly the same time. That overlap makes the earlier coordination meeting critical.
Before ceilings close, sign-off requirements are non-negotiable: rough-in inspection completed, hydrostatic test passed, and AHJ approval in place. If any of these items lag when the ceiling contractor is ready, the project schedule will absorb the impact.
Final Trim, Testing, and Inspection Sign-Off
Once ceilings are complete, final sprinkler trim proceeds: heads and cover plates are installed, and system testing is scheduled. Flow tests and AHJ inspections should be booked in advance, not at the last minute.
After approval, as-built drawings are submitted to close out the project. Delaying final inspection can push the certificate of occupancy by weeks, even when all other trades are complete. Common verification issues at this stage can delay occupancy; understanding typical deficiencies and corrective actions upfront helps avoid last-minute surprises.
The Bottom Line on Tenant Build-Out Sprinkler Planning
You do not plan around sprinklers as an afterthought in a tenant build-out—you plan for this critical life safety trade from the start. The earlier fire sprinkler design is integrated into the tenant improvement process, the fewer budget and schedule shocks you will encounter.
The core steps are straightforward: involve your sprinkler contractor during schematic design, align installation with ceiling milestones, resolve trade conflicts before mobilization, and submit permits as soon as design is ready. None of these elements are complicated—they simply require a clear owner and the right sequence.
Guardian Fire Services applies this level of planning and coordination to every tenant improvement sprinkler project we deliver. If your tenant build-out in the Nashville region or beyond needs disciplined fire sprinkler planning, the right time to start the conversation is before your design is set in stone.
Contact us to schedule a site assessment or call us to discuss the specifics of your tenant improvement project before your schedule is locked in.
Let’s cut to it: emergency lights need a 30-second test every month and a full battery discharge once a year. If you’re in the U.S., NFPA 101 spells this out clearly — monthly 30-second activation checks and an annual 90-minute discharge. That’s the baseline. Everything else builds from there.
Set recurring calendar reminders for the monthly check before you do anything else. It takes minutes, but it’s the kind of thing that quietly disappears from the to-do list until an inspector shows up. Self-testing luminaires and building monitoring systems can log monthly results automatically, which helps — but they don’t replace the annual field discharge. That one still requires boots on the ground.
Why does testing matter beyond just checking a box? Because batteries lose capacity over time without warning. Testing proves your lights will actually activate when mains power fails, that they’ll stay on long enough to get people out, and that your egress illumination meets code. Those three things together are what life-safety compliance actually looks like in practice.
Keep your inspection schedule written down and your records organized. Inspectors, your authority having jurisdiction (AHJ), and your insurance carrier all want to see documentation — not your word for it. UL 924 covers equipment performance standards; NFPA and BS standards set the testing intervals. When those overlap or conflict, defer to the AHJ or the more restrictive requirement, and document your reasoning.
Quick Summary:
Monthly 30-second check: Simulate a power failure, confirm the lights come on immediately, and log it. Set the calendar reminder now, not later.
Annual full-duration test: Run a complete battery discharge — 90 minutes under NFPA in the U.S. Block a full test day and plan around it.
Document everything: Signed, consistent logs for every test. Inspectors don’t want verbal assurances — they want paper trails.
Know your system type: Procedures differ between self-contained units, central battery systems, and computer-monitored setups. Know which you have before you start.
When standards conflict: Go with the AHJ or the stricter code. Use a qualified service provider for annual verification and any repairs that follow.
Monthly 30-second checks: The Test You Can Run in Minutes
The monthly check is straightforward — simulate a mains failure or hit the unit’s test button and watch what happens. The lamp should activate within 10 seconds. Hold the test for at least 30 seconds and look for dimming, flickering, or any error indicators. That’s it.
The trick is running the same sequence every time, on every fixture. A consistent path through the building cuts down ladder time and makes your records defensible if something ever gets challenged. When a fixture fails, tag it and keep moving — don’t stop the inspection to chase down one problem.
Here’s what to do at each fixture:
Follow lockout/tagout procedures and isolate circuits where required
Trigger emergency mode via power simulation or test button
Confirm the lamp activates within 10 seconds and holds
Watch for at least 30 seconds — note brightness level and any flicker.
Do a quick visual check for corrosion, damage, or loose fittings; use proper ladders and PPE for anything elevated
Log the date and time, fixture ID, location, tester name, and pass/fail result. Note any brightness concerns or immediate defects and flag action items. Keep it clean — one line per fixture, same format every time. When failures cluster in one area, that’s a pattern worth escalating rather than just tagging individual units. Phase repairs to minimize disruption and schedule professional service for high or hard-to-access fixtures.
Annual Testing: 90 minutes vs 3 hours
The annual full-duration discharge test verifies that batteries and central supplies will power exit and emergency luminaires for the time required by code. NFPA 101 specifies a minimum 90-minute discharge for battery systems in the United States and also requires monthly functional checks plus written records; for a concise explanation of the NFPA 101 requirements see this summary of Section 7.9 of NFPA 101. UL 924 confirms equipment suitability for emergency service; for information on testing and certification see UL’s emergency lighting testing and certification, while municipalities typically cite NFPA for enforcement.
Plan around this test. Phase sections of the building if you can’t take the whole system down at once. Schedule after-hours when possible and notify occupants in advance. During the discharge, measure lux values at the start and at regular intervals — gradual degradation shows up in those numbers long before a fixture fails outright.
If rules conflict, follow your AHJ or the more restrictive requirement.
Practical approaches include phasing annual testing so parts of the building remain powered, scheduling after-hours test windows, and notifying occupants in advance to avoid operational disruption. During the run, measure and log lux values at the start and at set intervals to detect degradation and support maintenance decisions.
Testing Differs by System Type — Know What You Have
Monthly fixture-level checks can usually be handled by in-house maintenance staff. Annual discharges are a different story — those belong with licensed electricians or a qualified service provider. Mixing those up is where things go wrong. See our Facility Manager / Plant Manager checklist for role-based task assignments and ownership templates.
Self-contained luminaires need a monthly per-fixture activation check and an annual 90-minute discharge. Simple enough for a small building. When you’ve got dozens of units mounted at height, the labor adds up fast — consider grouping elevated fixtures for a professional service visit while your team handles the accessible ones.
Central battery and inverter systems are tested at the bank level, not fixture by fixture. Run full-bank discharges under controlled load, phase banks to avoid interrupting life-safety power, and track voltage, current, and lux at set intervals. Gradual degradation tends to show up in those readings before you get a hard failure.
Computer-based monitoring and self-testing systems can automate the monthly activation checks and maintain trend logs, which genuinely reduces routine workload. They don’t, however, produce the human-verified annual report your AHJ expects. Plan a field verification and a signed report regardless of what the system logs automatically.
Documentation: What Inspectors Actually Want to See
Clean records matter as much as the tests themselves. An inspector who has to dig through disorganized logs is an inspector who starts asking harder questions. Use a consistent format so anyone can trace a test, find a defect, and see what corrective action followed.
At minimum, each entry should include: test date and time, test type and duration, fixture IDs, pass/fail, lux readings if taken, any defects noted, corrective actions taken, and the tester’s name and signature. One line per test, same fields every time.
Annual 90-minute discharge — 2026-10-12, 14:00 | 90min | F01–F12 | Pass | Avg 1.2 fc | Battery replaced F05 | Re-test scheduled | J. Smith
In the U.S., a practical baseline is four years of retained records, available on request. Store logs as searchable PDFs, keep encrypted backups, and attach time-stamped photos to any failure entries. You don’t want to be hunting for evidence during an audit.
If you’re recording photometric data, log initial and end-of-discharge lux values — target averages of 1 foot-candle, minimum 0.1 foot-candle as a general reference. BS 5266 recommends a full photometric verification every five years; if readings drop or your space layout changes significantly, get an engineer in for a proper lux survey.
Building a Maintenance Schedule — and When to Call in a Pro
Translate code requirements into a simple calendar with named owners for each task. Monthly checks and the annual discharge should be locked in as non-negotiable items — not suggestions, not “when we get to it.”
A solid maintenance template includes a monthly checklist, an annual full-duration block, a fixture ID table, log fields, a responsible-party column, and notes for CMMS import. Whether you use a spreadsheet, a printed sheet for on-site crews, or upload it into your CMMS for automated reminders is up to you. The goal is that nothing falls through the cracks.
Escalate to a professional when:
Batteries hit manufacturer end-of-life (typically three to five years)
Multiple fixtures fail in the same area during one inspection
Premature dimming appears during the annual discharge
Tag affected fixtures immediately, schedule corrective work promptly, and don’t wait on battery replacement when failures are affecting egress illumination. Phase repairs to maintain life-safety coverage while work proceeds.
Guardian Fire Services can handle on-site monthly or annual testing, full-duration discharges, battery replacement, photometric verification, and produce documentation your AHJ will accept. For teams where ladder work and fall exposure are real concerns, outsourcing the annual test is a straightforward risk management decision.
Final Checklist
Run a 30-second functional test every month — log it every time
Schedule and complete a full-duration discharge once a year — 90 minutes under NFPA, three hours under BS 5266
Keep consistent, signed records for every test
Know your system type and assign the right people to the right tasks
If you’d rather hand off the annual discharge entirely, Guardian Fire Services can perform the test, handle the documentation, and give you something your AHJ can sign off on without a follow-up visit.
How to Find Qualified Fire Sprinkler Installation Near Me
Searching for “fire sprinkler system installation near me” is the right first move when a commercial property needs reliable fire protection. But search results alone are not enough. Map listings, contractor websites, and trade directories often surface companies that rank well online without the local permit history to back it up.
Run several search variations — “sprinkler installers near me,” “fire protection contractors near me,” and “sprinkler company near me” — then merge those results into a single candidate list. Cross-reference each company against your local building department’s permit records and ask for project references from similar-scope work in your jurisdiction. That one extra step filters out companies that look credible online but lack the documented track record your project requires.
Quick Reference: How to Choose the Right Local Fire Protection Company
Search with multiple keyword variations and cross-check results against local permit records — not just star ratings.
Verify state/city contractor licenses, NICET certifications or factory approvals, and current certificates of insurance before any site visit.
Select the correct system type — wet pipe, dry pipe, pre-action, or deluge — based on your building’s occupancy classification and specific hazard conditions.
Request itemized written estimates from at least three qualified local fire sprinkler companies and tie payment milestones to objective project sign-offs.
How to Start Your Local Sprinkler Company Search Begin your search online, but treat those results as a starting point rather than a shortlist. After running your initial queries, verify each candidate in two places: your state or city contractor licensing portal and your local building department’s permit logs.
Online reviews highlight patterns, but permit history and completed project documentation prove real-world experience. Ask every company for at least two local references from jobs comparable in size and occupancy to yours — then follow up by phone. Ask those references specifically about scope adherence, timeline accuracy, and how the contractor handled problems when they arose
Run your initial screening call in under five minutes. Confirm:
Active license in your jurisdiction (get the license number)
Recent, comparable fire sprinkler installation experience
Willingness to pull permits and attend inspections
Ability to provide a detailed, itemized written proposal
What Credentials, Licenses, and Insurance to Require
Before accepting any proposal from a local fire sprinkler installer, require the following documentation in writing:
Credential
What to Verify
State or city contractor license
Active status + license number on file
NICET certification
Level and individual name for designers and techs
Certificate of Insurance (COI)
General liability + workers’ comp; verify effective dates directly with the carrier
Performance bond
Required by some jurisdictions and project owners
Factory authorization letters
Brand-specific; affects warranty validity and service options
Engineer of record
Required for stamped drawings where your AHJ mandates them
Do not rely on copies alone. Look up license numbers on the issuing board’s website and call the insurance carrier directly to confirm coverage dates. Validate factory authorizations through manufacturer representative contacts or official dealer portals. Maintain a single credential file for each bidder throughout the vetting and selection process.
What Types of Fire Sprinkler Systems Are Available — and Which One Is Right for Your Property?
Wet Pipe Systems Water is held in the pipes under pressure and discharges immediately when a sprinkler head activates. Wet pipe systems are the most common choice for occupied commercial spaces because they are fast, reliable, and cost-effective to install and maintain.
Dry Pipe Systems Pressurized air occupies the pipes instead of water. When a head activates, the valve releases water into the piping. Dry pipe systems are the correct choice for cold attics, unheated parking structures, and warehouses where freezing is a real risk.
Pre-Action Systems Water does not enter the pipes until a separate detection event occurs, adding an intentional layer of control before discharge. Pre-action systems are frequently specified for data centers, archives, museums, and other environments where an accidental discharge would cause serious secondary damage.
Deluge Systems Open sprinkler heads allow water to discharge simultaneously across all heads when the control valve opens. Deluge systems are designed for high-hazard environments — chemical processing facilities, aircraft hangars, and similar occupancies — where immediate high-volume suppression is required.
Your system selection directly affects engineering complexity, material costs, inspection frequency, and overall project timeline. When requesting bids, either specify your preferred system type or ask each contractor to recommend one with separate itemized pricing for each option.
What Is a Realistic Timeline for Fire Sprinkler Installation?
Every fire sprinkler project — from a small tenant improvement to a full new commercial installation — moves through the same core milestones:
Final inspection and certificate of completion
Site survey and existing system assessment
System design and hydraulic calculations
Permit submission and AHJ review
Material procurement (order long-lead items early)
Rough-in installation and overhead coordination
Hydrostatic pressure testing
Realistic timeframes by project scale:
Small residential installations: a few days to two weeks after permit approval
Mid-size commercial tenant improvements: three to six weeks from survey to final sign-off
Complex jobs with water supply upgrades or slow AHJ review cycles: schedule accordingly with built-in float
The three most common causes of schedule delay are predictable — and preventable:
Permitting lag: Submit permit applications as soon as design drawings are complete. Follow up with the AHJ weekly.
Water supply issues: Confirm municipal water capacity or plan for a fire pump or water main upgrade before locking in bids.
Trade coordination failures: Overhead rough-in sequencing between HVAC, electrical, and sprinkler must be agreed upon before mobilization — not resolved in the field.
On installation day, expect hanger placement, pipe routing, head installation, and hydrostatic testing. Final acceptance includes a fire marshal walk-through, as-built drawing submission, and certificate of completion. Prepare a concise punch list in advance so minor corrections do not delay final sign-off.
How to Get Accurate Quotes from Local Fire Sprinkler Companies
A well-structured Request for Proposal (RFP) makes bids comparable and exposes omissions before they become change orders. Every RFP for a fire sprinkler installation should include:
Site address, floor plans or photographs, occupancy classification, and preferred system type
Water supply data: static pressure, flow test results, and hydrant distance
Permit deadline requirements and AHJ contact information
Full scope definition: design, hydraulic calculations, permitting, installation, testing, and commissioning
Required certifications, insurance minimums, and payment milestone structure
Red flags in any proposal:
No license number or proof of insurance provided
Quote delivered by text or as a single-line number with no itemization
Large upfront deposit required before design or permits are filed
Vague or absent language about permit responsibility and inspection attendance
No reference contacts offered
Your contract should define scope, timeline, change-order process, permit duties, inspection acceptance criteria, warranty terms for parts and labor, and lien waiver requirements. Tie all payment milestones to objective project events — design approval, rough-in completion, and final acceptance — not calendar dates.
Why Local Expertise Matters in Fire Protection
Fire protection compliance is jurisdiction-specific. Permit timelines, AHJ relationships, and local water supply conditions vary significantly across any specific region.
Working with a fire sprinkler company that has an established permit history with your local building department and fire marshal office reduces review friction and minimizes surprises. A contractor who works regularly in your municipality knows what the AHJ expects, which matters when your occupancy date is fixed.
Frequently Asked Questions: Fire Protection Services Near Me
Q: How do I verify that a fire sprinkler company is licensed to work in my city? Check your state contractor licensing board’s online portal and confirm the license is active and in good standing.
Q: How long does it take to get a fire sprinkler permit? Permit review timelines vary by jurisdiction and project scope. Simple tenant improvements may receive approval within five to ten business days; larger or more complex projects may require four to six weeks for initial review, with additional time for revision cycles.
Q: What is the difference between a wet pipe and dry pipe sprinkler system? Wet pipe systems hold water in the pipes at all times and discharge immediately when a head activates—making them the standard choice for occupied, climate-controlled commercial spaces. Dry pipe systems hold pressurized air in the pipes and are used where freezing temperatures make water-filled pipes impractical.
How Do I Get Accurate Quotes and Choose the Right Installer?
A concise, well‑structured RFP makes it much easier to compare bids from local fire sprinkler companies and spot omissions. Define the scope clearly so every bidder prices the same assumptions and provides detailed, itemized costs. At a minimum, your RFP should include:
Site address, floor plans or photos, and desired system type
Water supply details, including static pressure, flow test results, and hydrant distance, plus any permit
Final Thoughts: How to Find the Best “Fire Sprinkler System Installation Near Me”
When you search for “fire sprinkler system installation near me,” focus on the fundamentals: proper licensing, adequate insurance, and choosing the right system for your building’s occupancy and hazards. Two practical takeaways stand out:
Verify credentials and select a system that truly fits your space and use.
Use strong documentation to avoid surprises during permitting, installation, and commissioning.
From here, your next steps are straightforward: run your search, narrow the list to three qualified installers, and ask each for a written scope, a copy of their license, and an insurance certificate before authorizing any work. Then schedule a site survey with a reputable local contractor to confirm system type and receive a transparent, itemized estimate. If you would like help, contact Guardian Fire Services to request a site evaluation and a clear, comparable proposal you can confidently put beside other bids.
Discover the 5 essential fire protection services every commercial facility needs — inspection, installation, maintenance, monitoring, and training. Guardian Fire Services serves Nashville and Middle Tennessee. Call 615-863-1077.
Why Fire Protection Services Are More Than a Line Item
A single vague line item on a vendor proposal can hide critical compliance gaps and set your facility up for costly surprises at the worst possible time. Commercial fire protection services encompass the full lifecycle of your building’s life safety systems—documented inspection, functional testing, system maintenance, new installation, 24/7 monitoring, and occupant training—all coordinated to keep your facility compliant and your people protected.
This post breaks down each of the five core fire protection service categories, defines what each one should include, and gives you a practical framework for evaluating vendor proposals side by side—so you can identify what’s missing before you sign anything.
What You Need to Know 1. Fire System Inspection and Testing
What it is: Scheduled, NFPA-compliant visual and functional checks of all fire protection components — with dated, signed reports that list every deficiency and required corrective action.
Inspection and testing are not a walk-through with a clipboard. A compliant program includes:
Weekly and monthly visual checks of sprinkler heads, control valves, fire extinguishers, and alarm panels
Quarterly and annual functional tests of detectors, flow switches, emergency lighting, fire doors, and dampers
Multi-year performance tests aligned with NFPA 25 inspection cycles for water-based systems
Written reports that document technician credentials, inspection dates, tagged deficiencies, required corrective actions, and completion deadlines
Common inspection targets in commercial facilities include sprinkler risers, fire alarm control panels, smoke and heat detectors, portable fire extinguishers, emergency egress lighting, fire doors, and HVAC fire dampers. Any compliant inspection firm should be able to produce audit-ready documentation on demand.
What to require from vendors: Itemized inspection scope by system type, NFPA edition and edition year used, technician NICET certification levels, and a sample deficiency report from a comparable project.
2. Fire Sprinkler and Suppression System Installation
What it is: End-to-end system design, permit coordination, installation, integration, and documented handover for new or retrofitted fire suppression systems.
Installation and ongoing maintenance are distinct service categories — and often separate contracts. Do not assume one includes the other. A properly scoped installation contract covers:
System commissioning, testing, and formal handover with as-built drawings
Hydraulic calculations and system design drawings stamped by the engineer of record
Permit application and coordination with the Authority Having Jurisdiction (AHJ)
Phased installation aligned with your construction or tenant improvement schedule
Fire suppression system types and common applications:
System Type
How It Works
Best Fit
Wet Pipe
Pipes charged with water; heads discharge immediately on activation
Standard occupied commercial spaces
Dry Pipe
Pressurized air holds water back until a head activates
All heads open simultaneously for high-volume suppression
Chemical plants, aircraft hangars, high-hazard processes
Clean Agent / Foam
Chemical or foam suppression where water causes secondary damage
Server rooms, flammable liquid storage, electrical equipment
NFPA 13 governs sprinkler system design and layout. NFPA 25 sets the baseline for ongoing inspection, testing, and maintenance frequencies. Ask every bidder which NFPA edition they used and whether local code amendments apply—this ensures proposals can be evaluated on a true apples-to-apples basis.
Cost context: New residential-style installations typically run lower per square foot. Commercial and retrofit projects run substantially higher due to pipe routing complexity, structural coordination, and code-triggered upgrades. Historic buildings and high-rises generally carry premium pricing and extended timelines.
3. Ongoing Fire System Maintenance
What it is: Routine servicing, valve exercising, component replacement, and software updates — documented in written maintenance logs with agreed service intervals.
A system that passes inspection can still fail between cycles if maintenance is deferred or undocumented. Comprehensive fire system maintenance for commercial facilities includes:
Valve exercising and lubrication on NFPA-defined intervals
Sprinkler head replacement for corroded, painted-over, or mechanically damaged heads
Fire alarm panel battery replacement and software updates
Written maintenance logs capturing service dates, technician credentials, parts installed, and remaining service life
What to require from vendors: Written maintenance logs, documented service intervals by component, parts and labor warranty terms, and itemized pricing for work outside the base contract so you know exactly what triggers an additional charge.
4. Fire Alarm Monitoring and Alarm Systems
What it is: Continuous central-station or cloud-based monitoring with documented escalation procedures, transmission methods, and service level agreements (SLAs).
Monitoring shortens emergency response time and reduces insurer exposure — but it commonly carries fees and service tiers that are easy to overlook in a bundled proposal. Key elements to define in any monitoring contract:
Transmission method: Digital communicator, cellular, IP, or dual-path redundancy
Central station certification: UL-listed or FM-approved central station required for most commercial insurance and compliance purposes
SLA terms: Acknowledgment time, maximum signal transmission delay, and uptime guarantees in writing
Supervisory signals, tamper alarms, and remote diagnostics should be explicitly included or excluded in the contract scope — not assumed.
5. Fire Safety Training and Portable Equipment Services
What it is: Occupant evacuation drills, staff fire extinguisher training, fire-watch protocol instruction, portable extinguisher inspection and recharge, and emergency lighting verification.
Training is the most frequently underscoped fire protection service in commercial facilities—and the one that matters most when something goes wrong. A complete training and portable equipment program includes the following:
Occupant evacuation drills conducted and documented at NFPA-required frequencies
Fire extinguisher training for designated staff covering PASS technique and extinguisher type selection
Fire-watch procedures for hot work operations, impaired system conditions, and special events
Portable extinguisher annual inspection, recharge, and hydrostatic testing per NFPA 10
Training records and portable equipment service tags are inspected by the AHJ and your insurance carrier. Gaps in documentation are a common compliance deficiency that can be avoided with a structured program.
How to Evaluate and Compare Fire Protection Service Proposals
Use this checklist when reviewing vendor bids to confirm scope is complete and compliant before you negotiate pricing:
Scope completeness:
Inspection and testing appear as a separate, itemized line—not bundled into a generic “service agreement.”
Installation scope includes permit coordination, hydraulic calculations, and as-built drawings at handover
The maintenance contract specifies service intervals by component, not just a blanket annual visit
Monitoring contract identifies transmission method, central station certification, and SLA terms in writing
Training scope includes documentation, deliverables, and record-keeping for AHJ and insurance purposes
Contractor credentials — require all of the following before signing:
Active state or city contractor license (verify the license number independently)
NICET certification — level and individual name for each designer and technician
Current Certificate of Insurance (COI) for general liability and workers’ compensation — verify effective dates directly with the carrier
Factory authorization letters for the major brands specified in the proposal
Minimum of two local references from comparable-scope projects
Red flags in any proposal:
No reference contacts provided
Vague or missing permit responsibility language
No itemization by system type or service category
A large upfront deposit required before design or permitting begins
Proposal delivered as a single total number with no scope breakdown
Next Steps for Fire Protection Services Schedule a 15-minute system health review with Guardian Fire Services to get a focused, practical assessment of your facility. A short survey will identify the top three risks, outline required compliance actions, and produce a prioritized cost estimate you can use to plan or include in an RFP. Read our Client Voices to see how other customers used a similar review, or request a site survey or download the hireready checklist to move from uncertainty to a clear, manageable plan that protects people and assets nationwide.
To provide the best experiences, we use technologies like cookies to store and/or access device information. Consenting to these technologies will allow us to process data such as browsing behavior or unique IDs on this site. Not consenting or withdrawing consent, may adversely affect certain features and functions.
Functional
Always active
The technical storage or access is strictly necessary for the legitimate purpose of enabling the use of a specific service explicitly requested by the subscriber or user, or for the sole purpose of carrying out the transmission of a communication over an electronic communications network.
Preferences
The technical storage or access is necessary for the legitimate purpose of storing preferences that are not requested by the subscriber or user.
Statistics
The technical storage or access that is used exclusively for statistical purposes.The technical storage or access that is used exclusively for anonymous statistical purposes. Without a subpoena, voluntary compliance on the part of your Internet Service Provider, or additional records from a third party, information stored or retrieved for this purpose alone cannot usually be used to identify you.
Marketing
The technical storage or access is required to create user profiles to send advertising, or to track the user on a website or across several websites for similar marketing purposes.